Overview
You can create sale orders in two ways.
How can I create an order with Delhivery?
Steps to create a Sale order
Navigate - Main Menu > Orders > Forward Orders > Create Forward Order
Creating and Manifesting a New Order
This document outlines the complete workflow to create a new order, add pickup and customer details, configure products and packaging, and finally manifest the order.
Step 1: Start a New Order and Add a Pickup Location
On the Create New Order screen, open the Pickup dropdown menu to select relevant pickup address or Add a new pickup location as per facility address.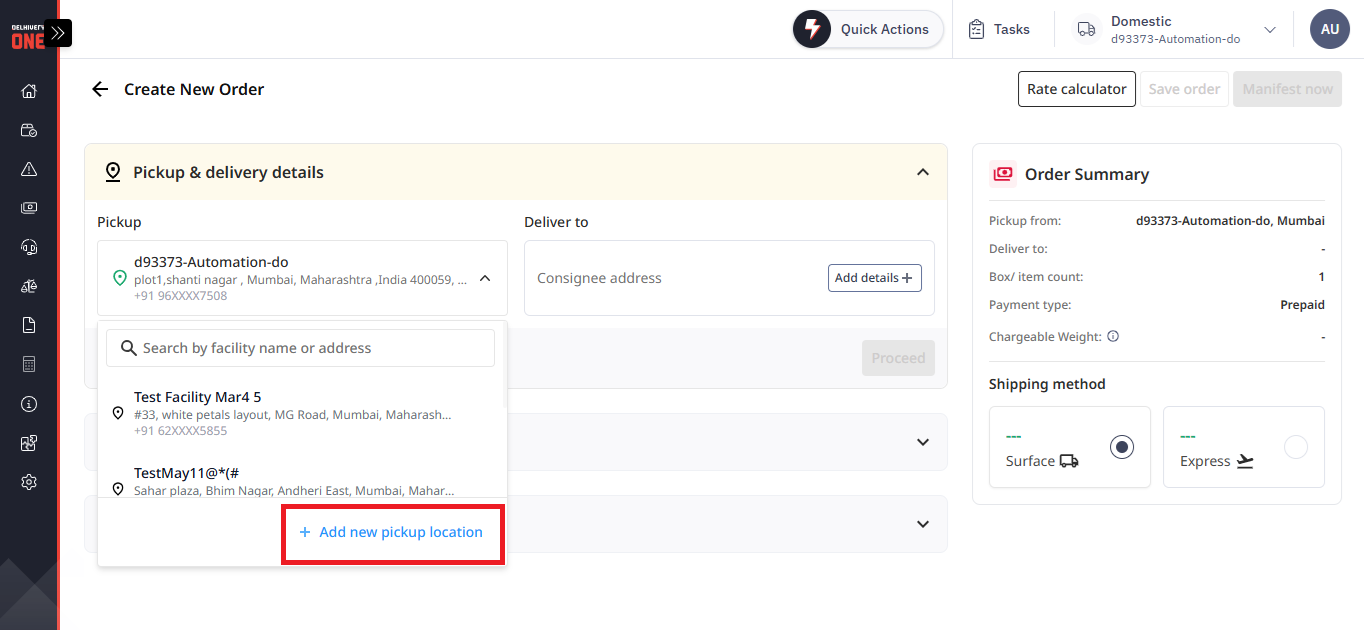
The Add Pickup Location modal appears. Review and fill all the available form fields and then click Add pickup location.
.png)
Step 2: Enter Delivery (Customer) Details
Click the option to add delivery details to open the Add Customer Details modal. Enter the following information:.png)
Customer name
Contact number
Address
Pincode
Email ID (optional)
After filling in the details, click the Add customer details button to store the customer information.
If the Billing and Shipping address is the same for a Customer, you can checkmark the billing address as the same as the shipping address under the payment details section.
Use our Free AI-driven Bad address predictor to correct incorrect addresses and improve deliverability. You can find Bad Address orders during order creation or using the Order Filter on the Order Listing page or from the Order Detail page.
.png)
Step 3: Configure Order Details
Proceed from delivery details to the Order details section. Open the Channel selection menu and choose relevant channel name and review seller details. Learn more about adding channels from here.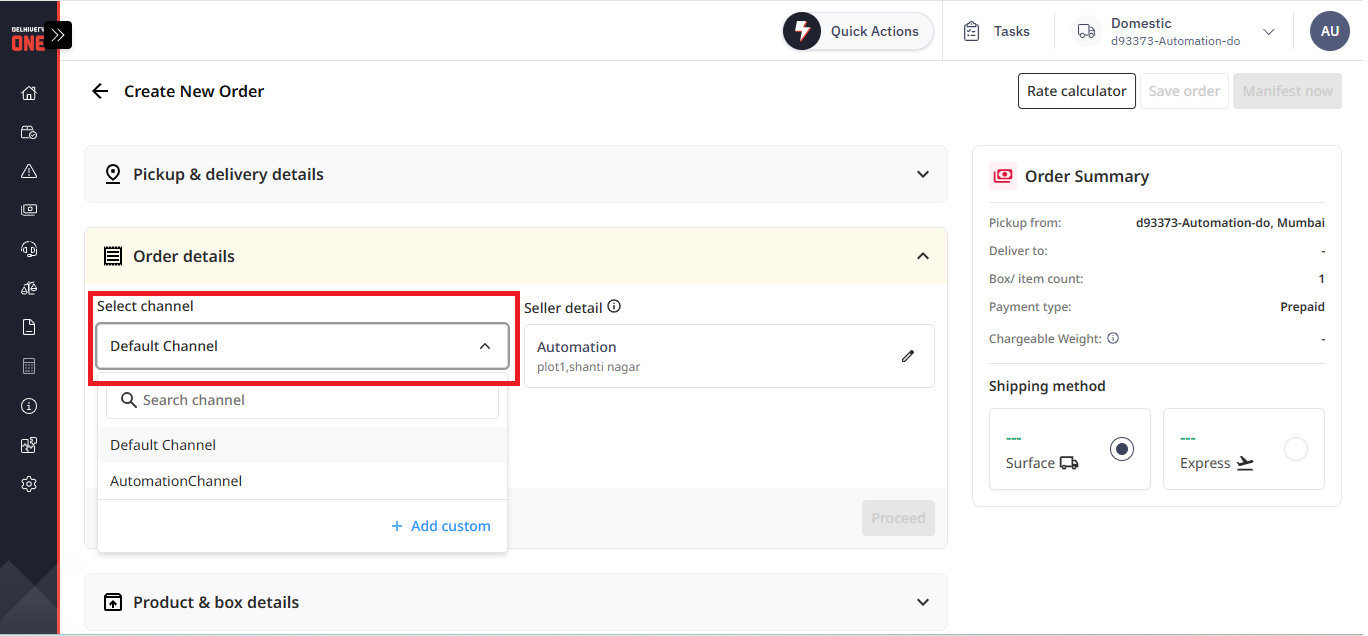
Adding Seller Details
You can also add Seller details (optional). The entered details (Name, GST Number, Address) shall be printed and visible on the Shipping Label. If no seller details are added, the company details will be printed on the Shipping label..png)
.png)
Click in the Order ID field, type your order reference number, and then click the Proceed button to move to the next section.
.png)
Step 4: Select Product and Review Product Options
In the Product and box details area, click the product search field and select the item(s) to ship. You can type the name of the item you want to add to the Sale Order. If present, the item details will populate in the drop-down list; otherwise, create a new item..png)
If you need to add a new product, click the Add new product link to open the Add Product form. Review the form fields, then click the Save button to return to the main screen and add that item to the order..png)
Select "My package contains fragile items" to provide specific handling instructions during transit..png)
Step 5: Review Packaging Settings and Package Types
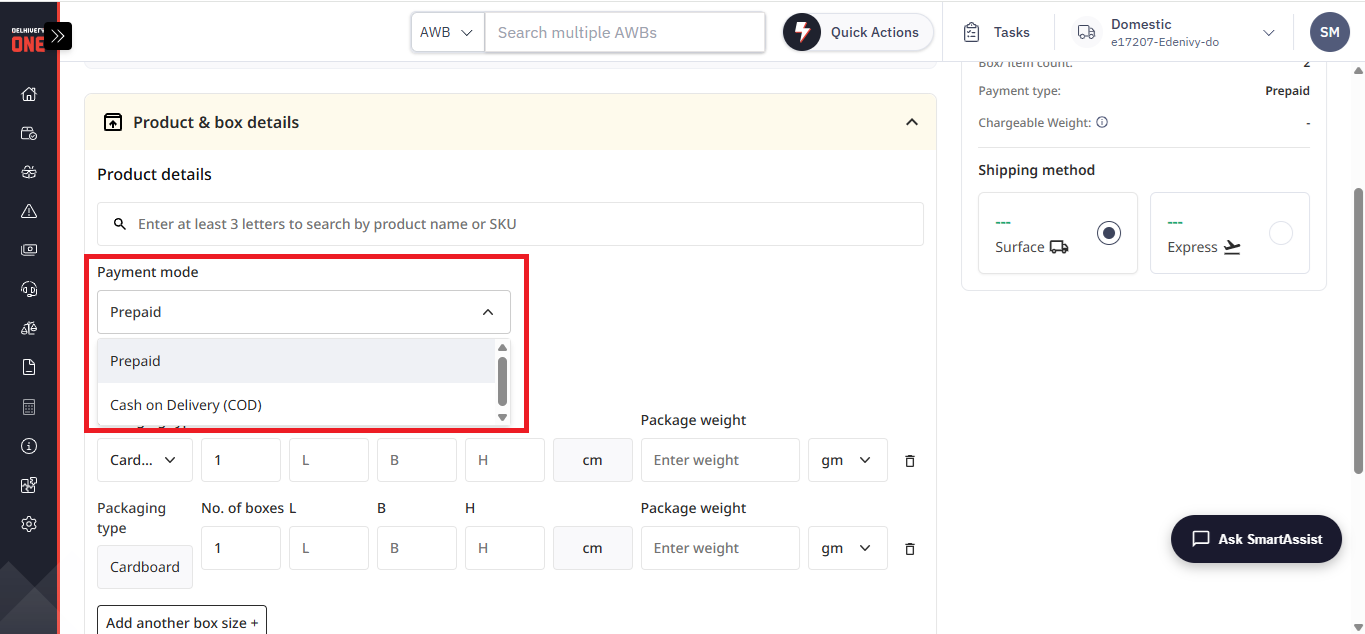
Review the current Payment mode and Packaging type settings for the order. If you want to add more packaging options, click to Add a new package type, which opens the Shipping package modal, complete and save it to use in future.
Prepaid - Consignee has already paid the Invoice amount at the time of placing the order.
Cash on Delivery (COD) - Cash that needs to be collected from the Consignee when delivering the order. The collection amount can be equal to or less than the order Invoice value..png)
Package Type:
At Delhivery, we consider higher of the volumertric or dead weight to estimate shipping cost. But if the shipment is packed in a flyer, we charge only on basis of dead weight upto 1 KG. Shipping MPS Order If you are shipping a Multi-Piece shipment, you can add upto 5 boxes in an order and enter their box dimenions and weight separately. All boxes in an MPS will be picked and delivered together.
Step 6: Add an Additional Box and Enter Dimensions
Click the button to Add more boxes to the order. For the second box, enter:
Dimensions
Package weight
After entering these values, click Proceed to continue.
.png)
E-waybill Number
If your order value is more than Rs 50,000, then you need to mention a valid E-waybill number in the item details mandatorily.
.png)
Step 7: Review Order Summary and Manifest the Order
In the Order Summary, compare available shipping methods by switching between the Express and Surface options and reviewing the price breakup for each. Once satisfied with the selection, click Manifest now to finalize the shipment.
.png)
The system processes the request, and a success message confirms that the order has been created and manifested successfully.
How can I Duplicate/Clone an order with Delhivery?
Steps to duplicate/clone a Sale order
Navigate - Main Menu > Orders > Forward Orders > More Button > Clone Order to duplicate the existing order
.png)
You can also clone the order in any shipment status from the shipment detail page similarly from the Clone Order action present in the “More” button
.png)
How can I send bulk orders from Delhivery?
If you are a business that ships more than ten orders a day, adding bulk orders will be a more optimal way to create orders.
Steps to add Bulk Orders
Navigate to Main Menu > Orders > Forward Orders > Upload Bulk Orders
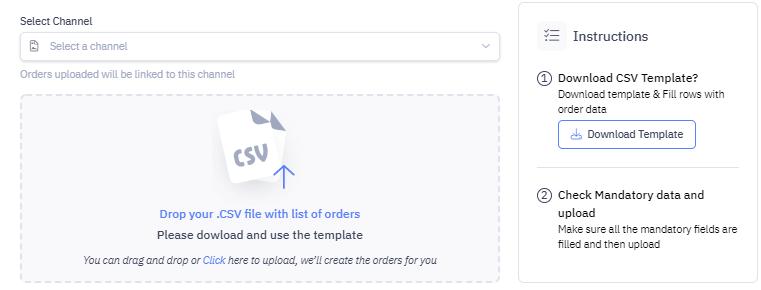
Select the Channel that orders belong to
Download the sample CSV template, fill in the mandatory Information and Upload file. Mandatory fields will have an * (asterisk symbol) before the field name.
You must mention the COD Amount properly to avoid payment disputes if you ship COD orders.
If you want to add multiple product SKUs to the same order, please follow these steps:-
Use the same order ID in the different rows per your total number of products. For example, fill three rows with the same order ID if you have three products.
In each row enter the different Product SKU Code, SKU Name, Quantity, and Price corresponding to each product.
All the other mandatory fields remain the same.

Once uploaded, orders are created in pending state.
You can refer to the glossary for the required fields for Sale order upload
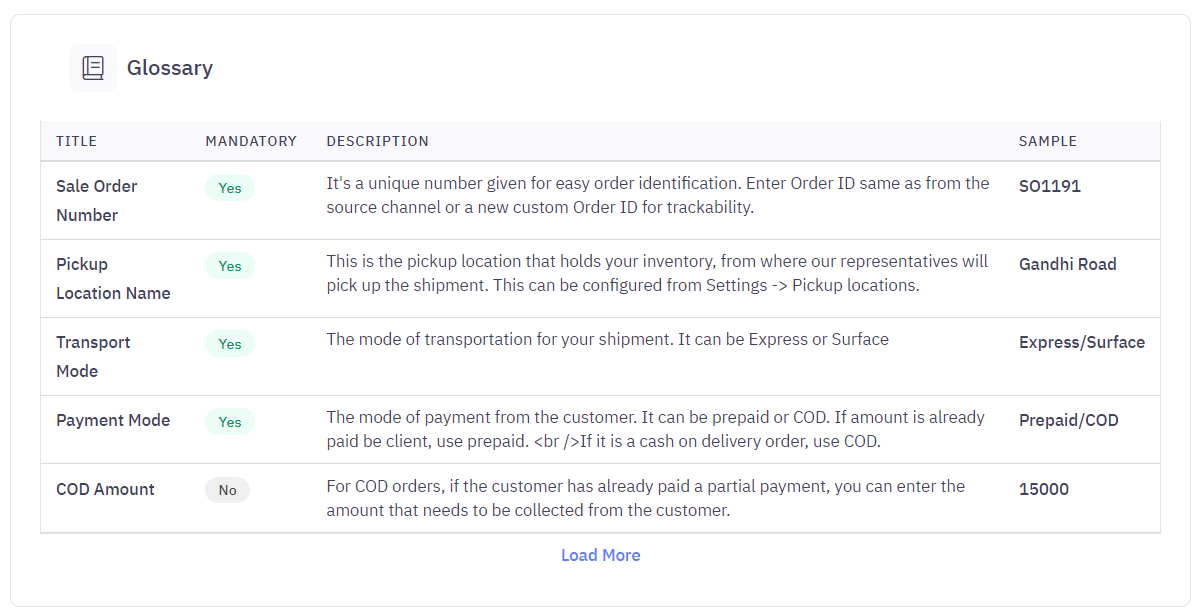 . Your sale order(s) are created successfully; now we'll learn how to Process orders.
How can I send bulk shipments from Delhivery One?
You can skip the order creation process & add shipments in bulk
Steps to add shipments in bulk
Navigate to Main Menu > Orders & Pickups > Forward Orders > Upload Bulk orders > Upload Shipments.
.gif "bulkshipment(1).gif")
2. You can download the XLSX template, fill in the details & upload the file. Shipments will get created under Ready to Ship state.
For the first column of Waybill, you can generate waybills from Main Menu > Information Center > Fetch AWB numbers > Mention the number of AWB required > Click Fetch AWBs. A csv file consisting of waybills is generated.
.gif "getawb(1).gif")
You can open the upload task created from the portal during the upload process in a tab by clicking on the “Go to the task” CTA to check for errors in the shipment upload file.
.png "image(137).png")